Monday, October 28, 2013

DRY-FRUIT LADDU

A recipe which includes the goodness of all the nuts and natural sweetness of dates. For those who will want to eat the dry fruits everyday but forgets the same thing everyday. A small laddu includes 2-3 nuts of all kinds. This is also very good for pregnant women who will have to eat a handful of all kinds of nuts every day. On the top of it this is made with dates which is rich in iron, potassium, calcium, natural revitalizer and doesn't include any sugar. Also a best way to treat your kids with a healthy something.

INGREDIENTS

Almonds                  1/2 cup
Cashews                  1/2 cup
Pistachios                1/2 cup
Khishmish               1/2 cup
Dates                       1 large cup(about 20)
Honey                      3 Tsp
Cardamom powder  1 Tsp
Ghee                        to grease your palms + 1 Tsp

PROCEDURE

Chop all the nuts Roughly.(You can chop them with a knife or in a chopper. Nuts are hard....be careful.)
Chop or grind the dates finely.
Dry roast the nuts one by one on a slow flame.(not the khishmish)
They should be roasted but should not change the color.
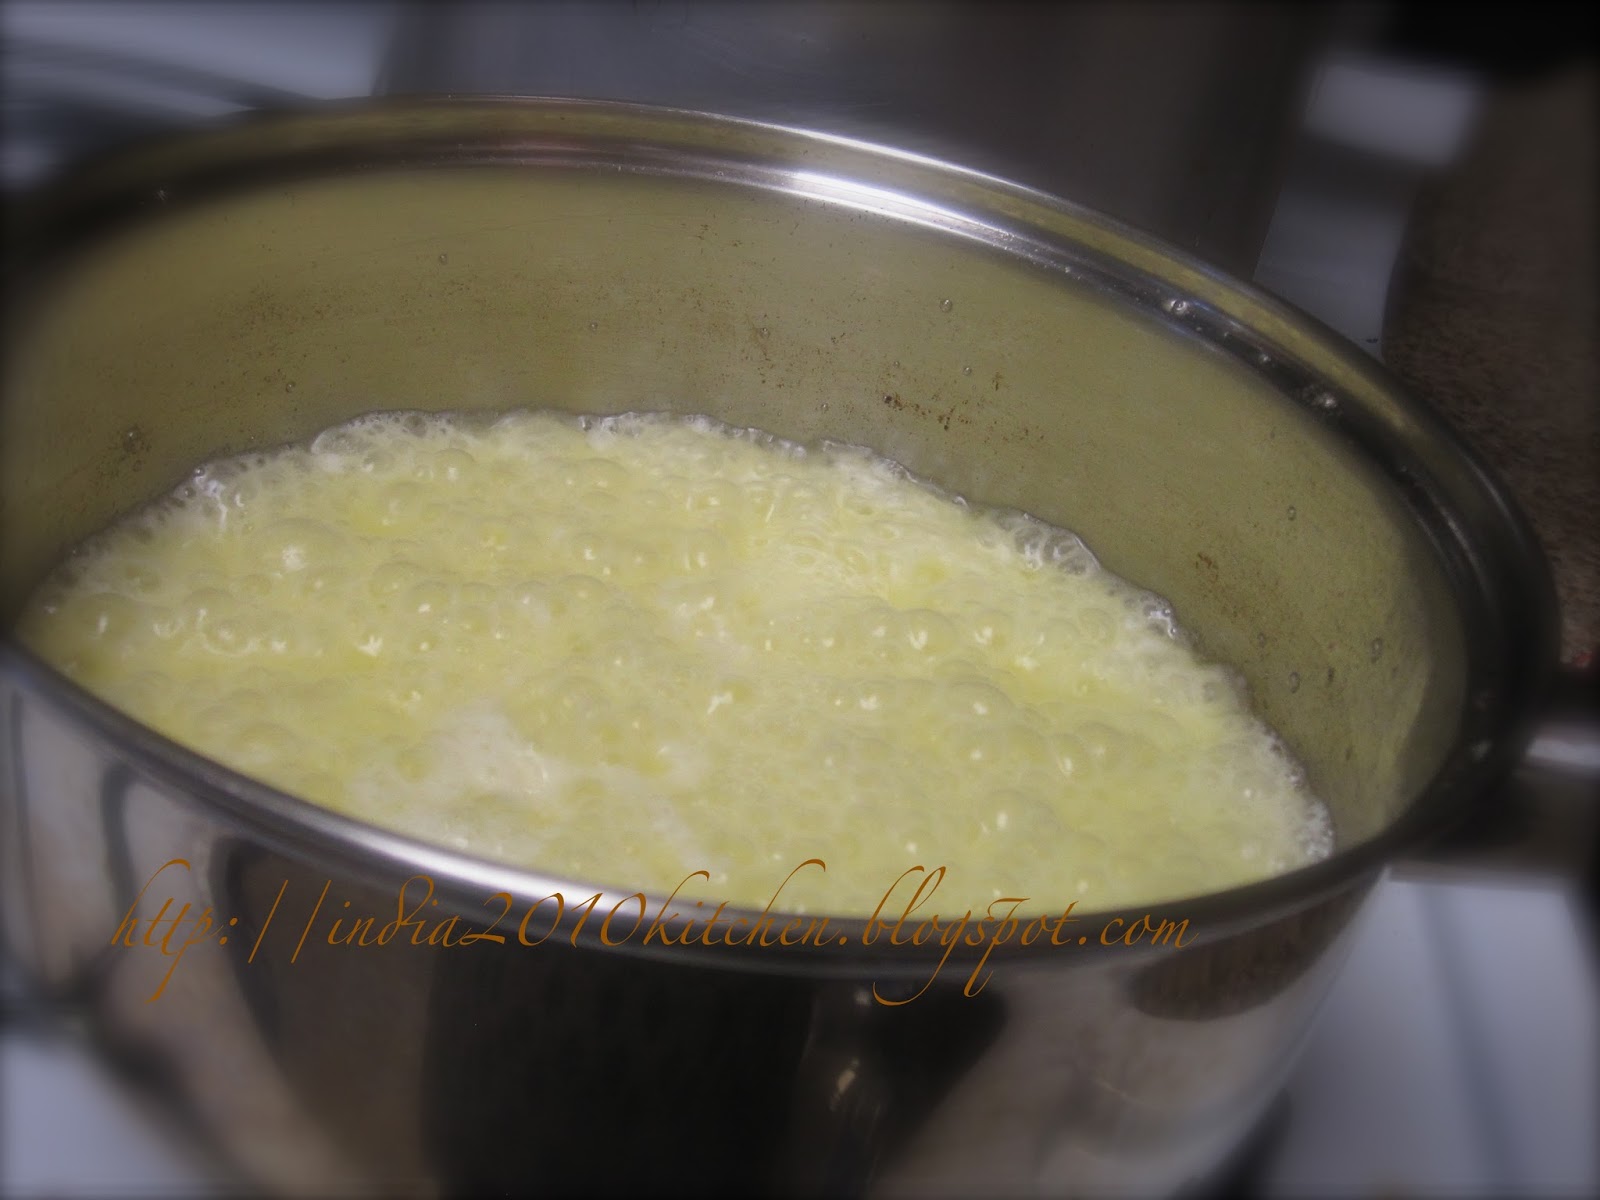
Heat 1/4 cup of water in a pan.
Boil the water and add the dates.
Keep stirring and mix well so that a thick paste of dates is formed.
Add the honey and cook till a thick and gooey mixture is formed. Add the fried nuts, cardamom powder, 1 Tsp of ghee.
Switch off the flame and take the whole thing onto a greased plate.
Let the mixture cool and even when it is still warm make the laddus by greasing your palms with ghee.

TIPS

  • You can also add walnuts, pecans and anything of your choice.
  • Skip honey and add 4 Tsp of sugar for an extra taste.
  • You can also add the saffron strands.
  • You can roll the laddu in dry coconut powder for different taste and the laddu will not stick on to your hands.


SEMIYA UPMA


Upma and idly are one of those recipes which many of the children would never want. Idly is idly and it cannot be changed. Although you can make vegetable idly or ravva idly you cannot make more variations and cannot satisfy your child. But this is not the case in upma. You can make upma with sooji, wheat ravva, semiya, poha, bread and so on. So if your child  doesn't like one upma you can try another. And now coming to semiya upma, it is loved by every one.

INGREDIENTS
Semiya                        2 cups
Potatoes                      1 diced
Carrots                        1 diced
Onions                        1 chopped
Tomatoes                    1 chopped
Chillies                        2 chopped
Curry leaves                a few
Water                          5 cups
Oil                              5 Tsp
Chana and urad dal    2 Tsp
Mustard                      1 tsp
Cashews                     10
Salt                             to taste

PROCEDURE
Heat a table spoon of oil and fry the semiya till golden brown.(You can also readily buy roasted semiya). Set the fried semiya aside.
Now heat the remaining oil and add the mustard, dals, cashews.
When the dals turn golden brown add the veggies, green chillies, curry leaves, salt(for the whole upma).
Cover and cook till the veggies are soft.
Now add the water and bring to a boil.
Add the semiya.
When all the water is absorbed by the semiya, slow down the flame and cover with a lid.
Cook till the oil comes to the top.(It takes about 10 to 12 minutes on a slow flame).
Mix well and serve hot.

MASALEDAR ARBY FRY

Arbi is one such vegetable which is rarely used in day to day recipes. There are no too many dishes which can be made with this veggie. A fry or a stew is common with Arbi. Here I am going to give the recipe which is also a fry but with masala. It is a good combination with sambar rice.

INGREDIENTS
Arbi                        Boiled and peeled  1 large cup
Jeera powder          1 tsp
Coriander powder  1tsp
Oil                          1/4 cup
Salt                         to taste
Chilly powder        1/2 tsp
Garam masala        1/2 tsp
Garlic                     2 cloves(crushed)

PROCEDURE
Boil the arbi in an open pot and not in pressure cooker. They should be fully cooked but still be firm.
Dice the boiled and peeled arbi into bite sized pieces.
Heat oil in a pan and when it is really very hot add the arbi pieces, crushed garlic.
Fry on medium high flame till golden brown. You can now remove any of the excess oil.
Now add the salt, chilly powder, jeera and coriander powder, garam masala.
Toss completely and serve with rice.

Wednesday, October 23, 2013

SEASHELLS CENTERPIECE

Some seashells(painted with blue), white craft sand, candles made this awesome centerpiece. Finally a few beads here and there gave the pearl effect to the sea look centerpiece. 


After looking to the above centerpiece this may not impress you, but this is very simple and gives an elegant look to your table. Plain seashells, a glass tray and a candle and thats it........


CARD BOARD WALL SHELVES.

If you live in an apartment where you are restricted from drilling holes into the wall for arranging wall shelves or cubes then this will be a good idea. I used old cardboard box edges to make these wall shelves. I wrapped the card board in wrap paper. Pushpins from up and down can hold your decoratives. Although they cannot hold large weights, you can place small little things to give a new look to your room.


.


Tuesday, October 15, 2013

SHRIKHAND

When I first heard of a sweet which is purely made with curd I thought it is not my kind of recipe because neither I like the sweet lassi nor the sugar  mixed curd. But believe me this shrikhand changed my opinion altogether. I don't know the taste of sugar mixed curd, but sugar when mixed with hung curd is heavenly. Fresh whole milk curd is best suited for the recipe.
The preparation is simple but the taste is not. The saffron brings a unique taste and flavor to the dish. Give it a try.

INGREDIENTS

Whole milk curd                 2 cups
Sugar powder                     1/4 cup
Saffron strands                    a big pinch
Milk                                    2 Tsp
Cardamom                          1 tsp
Pistachios                            to garnish

PROCEDURE

Take the fresh whole milk curd in a muslin cloth and  tie the cloth in the refrigerator so that all the water is removed. Let it sit for 2-3 hours.(be sure to place a bowl underneath).
Soak the saffron strands in hot milk.
The curd now is called as hung curd.
Alternatively you can also use the whole fat greek yogurt which is already strained yogurt.
Take the hung curd in a bowl and add the sugar powder, milk soaked saffron, cardamom powder.(Adjust sugar according to your taste).
Mix throughly and serve with garnished nuts on the top.

CORN AND PEAS FRIED RICE(INDIAN STYLE)

A simple and tasty flavored rice which is a good for any party or function. This is certainly a crowd pleaser. Can be made in no time and all you need is some whole garam masala, peas and corn. As both the corn and peas are on the sweeter side, a rich spicy gravy can be a good side dish. Give it a try.

INGREDIENTS
Cooked rice                 3 cups
Peas                             1/2 cup(cooked)
Corn                            1/2 cup(cooked)
Whole garam masala   cardamom, bay leaf, cinnamon, shahi jeera, cloves
Pepper powder            1/2 tsp
Salt                              to taste
Tomato chilly sauce    1 Tsp(Hot and Sweet sauce)
Oil                               4 Tsp

PROCEDURE
I made the fried rice and not the pulao so I used the pre cooked rice.
Heat the oil and add the garam masala.
Quickly add the peas and corn. Fry for a minute and add the pepper powder, salt, tomato chilly sauce.
Mix well and add the cooked rice.
Mix well, cover and leave for a minute or so.
When all the flavors incorporate well in the rice serve hot with any spicy gravy and raita.
If this is for kids you can skip the sauce.


Friday, October 11, 2013

PURNAM BOORELU

A very traditional telugu recipe which is made for special occasions such as pooja, festivals and marriages. A very special naivedyam to Goddess Lakshmi is purnam boorelu. The light crunchy outer layer with sweet filling make this Andhra sweet a traditional delicacy. A few simple ingredients and a simple procedure but many don't dare to do these as a simple mistake in making the stuffing can end up in complete failure. Here I give a procedure which you cannot go wrong any time. Make this special naivedyam for this Dussara.

INGREDIENTS

Urad dal                   1 cup
Rice                          2 cups
Salt                            a pinch
Oil                            for deep frying

for the filling

Chana dal                  2 cups
Jaggery                      1+1/4 cup(grated)
Elachi powder           1 tsp

PROCEDURE

Soak the dal and rice for at least 4 hours and grind to a thick Batter. Much thicker than the dosa batter. Add a pinch of salt. If possible let it rest for 5 to 6 hours. If for naivedyam you don't get that much time, so add a pinch of baking soda. If you use a wet grinder for making the batter you need not use the soda.
Th general and traditional way for making the filling is cooking the dal in a pressure cooker and grinding it along with the jaggery. But this can be tricky as the filling can quickly turn into a runny batter if correct amount of water is not used or if you over cook the dal.
I give a very simple and never go wrong procedure for making the filling.
Soak the dal for at least 4 hours and then wash it throughly. Cook the dal with 3 cups of water on high flame for 10 to 12 minutes without the lid. Check if the dal is cooked. Now remove the water and lay the dal on kitchen towel and let it completely dry.
After an hour or so grind the dal in a mixer. Add the grated jaggery and pulse the mixer so that a thick paste is formed. Add the cardamom powder and the filling is now ready.
Divide the filling into equal size balls.
Dip these balls into the urad dal and rice batter and deep fry them on medium flame. Make sure that the outer layer completely covers the filling. Use a large spoon to gently drop the purnalu into the hot oil.
Offer them as naivedyam and serve with hot ghee on the top.

TIPS
If the outer layer batter is runny or you are not able to coat the filling with the batter add some rice flour to the batter.
If the filling is runny keep it on the stove for 10 to 15 minutes. Keep stirring. When the mixture thickens   remove on to a greased plate and let cool. By now the batter will thicken and you can easily make the purnam boorelu.

Friday, October 4, 2013

POPSICLE STICK TRAYS

 I have already posted my crafts with ice cream sticks. Now I post the images of my popsicle stick trays.
You can make these in less than 15 minutes(of course the drying time is 2-3 hours).
Small, medium, large, square or rectangle.....any thing is cute. If you use best quality glue then the larger tray can be used as a fruit tray. I arranged the sticks in a row and glued some sticks at the bottom of the tray. The railing(sides) has two sticks glued together with one pair over another.


BOTTOM OF THE TRAY

SEA SHELLS AND CANDLES

I have already posted my popsicle stick trays. I used one of the trays to make this cute candle holder. This decor with some seashells and candles in the tray made my center table look awesome. I have used the decorative battery operated candles, you can also use the votive candles.


Thursday, October 3, 2013

MAMIDIKAYA TURUMU PACHADI

When it comes to recipes with raw mango, Aavakaya takes the top position. Apart from this many other   pickles and chutneys are also made. Mamaidikaya turumu pachadi is one such recipe which is simple to make and can be stored for a month or two. And more over it can be made when ever you find mangoes in the market. Give it a try.

INGREDIENTS
Grated mango                    2 cups
Gingilly Oil                        1/2 cup
Chilly powder                    2 Tsp
Salt                                     2 Tsp
Fenugreek powder             1 Tsp
Mustard powder                 1/2 tsp
Mustard seeds                    1 Tsp

PROCEDURE

To make the fenugreek powder, dry roast the seeds till they turn dark brown. Dry roast them on a slow flame. Cool them and grind them to a very fine powder.
Heat the oil in a pan and add the mustard seeds.
When the mustard splutters switch off the flame and let the oil cool.
Now add the chilly powder, fenugreek powder, mustard powder, salt. Mix well
Finally add the grated mango.
Let the mixture sit for 3 to 4 hours.
By this time all the flavors will incorporate into the mango.
Serve with rice or any breakfast.

GARLIC AAVAKAYA

A simple, tasty and healthy aavakaya..........yes..........Many say Aavakaya is not good for health, but this special aavakaya is made with healthy ingredient garlic. Garlic is a natural antibiotic, controls blood sugars, decreases blood pressure, good for heart, used as antiseptic and the list goes on and on. Eating garlic everyday keeps you away from health disorders. So why eat it as a medicine, enjoy the taste of garlic with this aavakaya. Having this in rainy and winter seasons helps  the immune system to fight against common cold and cough which are common during these seasons.

INGREDIENTS

Garlic cloves                2 cups
Salt                              2 Tsp
Chilly powder              2 Tsp
Oil                               3/4 cup
Mustard powder           1+1/2 Tsp
Fenugreek powder       1/2 Tsp
Tamarind pulp              2 Tsp

PROCEDURE

Heat oil in a pan and add the garlic cloves. Fry for few seconds. The cloves should not change color or become soft. The cloves should remain hard.
Remove from the oil and let cool.
Boil tamarind in water and extract the pulp. You can also use ready to use pulp.
Once the oil is cooled add the salt, chilly powder, mustard powder and fenugreek powder, tamarind pulp.
Now add the garlic cloves in the mixture.
Let it sit for a whole day.
Now the oil comes to the top and the garlic will absorb all the spices.
Have it with hot steaming rice.  

Wednesday, October 2, 2013

FIRE ROASTED CORN COBS

A healthy snack for kids on a rainy day is kalchina mokkajonna kande (fire roasted corn cob). Now a days you find packaged corn kernels  in every departmental store, but eating the corn directly from the cob is a beauty. When I was a kid they used to sell corn cob roasted on the charcoal furnace on the road side and the taste of it........ awesome. Our kids are lacking all that fun. Here I give how to roast the corn cobs in you home.

Choose corn cobs which are fresh(letha mokkajonna kandelu in telugu). To check if they are fresh, pierce one or two kernels. Milk like substance should come out immediately. All the kernels should be shiny.

Stripe off the husk and fibers from the cob.
Roast the corn cob on open fire or charcoal furnace evenly on all the sides.
All the sides will turn reddish brown if you use a charcoal furnace, or else you can roast on the gas flame and they will look like my corn cobs.
If the corn kernels are really fresh you can enjoy it as is.
You can also smear some butter, salt, red chilly powder and squeeze some lemon juice on the cob.

Tuesday, October 1, 2013

INSTANT COFFEE RECIPE

A hot cup of perfect coffee is the best way to kick start your day with.You may be wondering why am I giving the recipe for instant coffee. There are so many who don't know how to make a perfect cup of coffee even with the instant coffee powder. Its not my intension to hurt them, but I want to give the recipe for coffee which not only enhances the taste but also the flavor.
Its not just mixing in the coffee powder, sugar and milk......its beyond that. Its a bit time taking but its worth it. If you are having a back pain or shoulder pain don't try the recipe! I am just kidding...., but beware you have to beat  the mixture for about 10 minutes!!!Yes, a perfect cup of coffee needs that much time and effort....... Finally, the recipe which I give here is taken from Chef Sanjeev kapoor's recipes.

INGREDIENTS

Whole milk                    1 cup(8oz cup)
Instant coffee powder    2 tsp
Sugar                             2 Tsp

PROCEDURE
I use 1heaped tsp of coffee powder for every 4oz of milk. You can adjust it according to your taste.
In a large cup add the coffee powder, sugar and 1tsp milk.(no more than this)
With a spoon mix it throughly.
BEFORE AND AFTER MIXING WITH SPOON

Beat with the spoon for 10 to 12 minutes till a creamy mixture is formed. Look at the above figure.
The color will turn to light brown and consistency will be airy, the volume will increase.
Top it with boiling milk.
Stir lightly and serve hot.


HOME MADE GHEE

If you are in India, you are sure to get fresh ghee at any grocery store. But once you come out side India, you cannot get fresh ghee, and even though you get it from the Indian store it doesn't  taste good. You can make fresh ghee at your home and store it for a month or two. And of course fresh, home made ghee tastes good and is healthy for your kids.

INGREDIENTS
Unsalted Butter                   1lb
Fenugreek seeds                  1 Tsp
Large, deep and thick bottom pan

PROCEDURE
Take the room temperature butter and cut into pieces.
Place the butter in the pan and keep it on the stove.
When the butter melts completely add the fenugreek seeds(gives an added flavor to the ghee).
Keep on stirring from this point. Keep the flame on medium.(strictly medium or low)
The butter becomes frothy and if your vessel is small it is certainly spill out of the vessel. So make sure you use a large vessel.
If the butter has more water then the butter may splutter on you, be careful.
A point is reached when all the froth is disappeared and you will  see only the bubbles.
Keep stirring.
Once the bubbles start to disappear and you stop hearing the spluttering noise and the nice aroma fills your kitchen, then your ghee is ready.
You will also be left with dark brown residue at the bottom.
If the residue is lighter in color, or say the residue is in light honey color then you have to wait for another few minutes.
Switch off the flame. Let remain for 15 minutes.
Stain the ghee(you don't want any of the fenugreek seeds in the ghee).
You can store it for 2 months without any doubt.
If you use the ghee occasionally refrigerator it.
You can add a little piece of jaggery while storing to retain the freshness of the ghee.

Related Posts Plugin for WordPress, Blogger...