Saturday, August 28, 2010

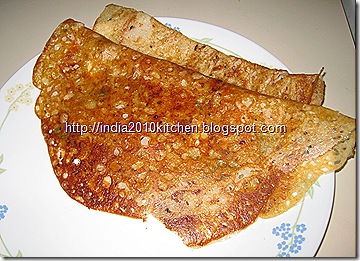
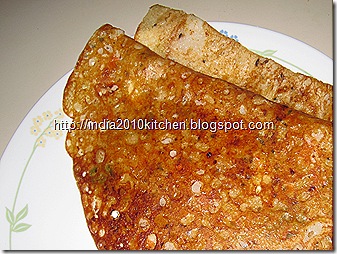
RAVA DOSA

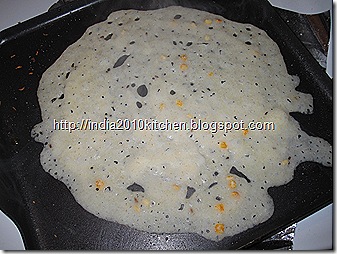
RAVA DOSA Rava dosa is called as ravvattu in Telugu. These crispy, net textured, Indian pancakes can be had for breakfast or can replace dinner. This purely South Indian Rava dosa is a favorite of many, but making these remained a mystery for many others. Right from the ratio of rava to the flour, Mixing of the batter, Thickness of the batter, art of pouring the dosas, every thing plays an important role in getting  the right mouthwatering dosa. One important point to note is, as the name itself suggests, these are rava dosas, so the main  and dominating ingredient should be the rava and not the flour. This I have mentioned specifically because I have seen many making the batter with lots of flour and a little bit of rava. Here I come with a recipe of rava dosa which has the base in my Mom’s recipe, but with my own variations.
INGREDIENTS  
  • Rava(suji)                    2 cups
  • Maida                          1/4 cup
  • Rice flour                    1/4 cup
  • Salt                             to taste
  • Oil                               2 Tsp
  • Chana dal                    1/4 tsp
  • Urad dal                      1/4 tsp
  • Mustard                      1/8 tsp
  • Curd                            1/2 cup(optional)
  • Water                          to mix the batter
for the filling
  • Onions                       1 (finely chopped)
  • Grated carrot             2 Tsp
  • Cashews                     a few
  • Green chilies             2 (finely chopped)
  • Oil                              for frying
  • Ginger                        small piece(finely chopped)
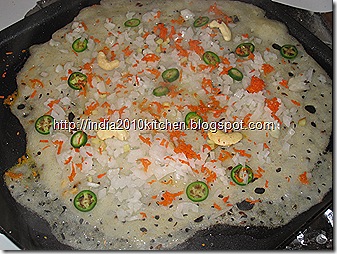
PROCEDURE In a pan heat oil and add the chana dal, urad dal, mustard seeds. When the mustard seeds splutter add the rava and fry for a minute. Keep the flame low so the rava do not burn. Now remove the rava into a bowl and let it cool. Now add the salt, maida, rice flour and the curd. Mix well and add enough water to make a thin batter. Let the batter rest for half an hour to 45 minutes. By this time the batter tend to thicken a little bit. Add water if required. It should be of the pouring consistency and thinner than the regular dosa batter. Unlike the regular dosas, the rava dosas are made just by pouring batter onto the pan and the batter is not spread with the laddle. So the consistency should be very thin.RAVA DOSA Heat a tava and smear some oil onto it. Mix the batter well and pour a ladle full of batter in circular direction on the tava starting from the edges of the tava. Take another ladle full and cover the middle  pocket  in the  dosa  to form a perfect round( Do not try to spread the dosa with ladle).  When the top layer tends to change color sprinkle the chopped onions, grated carrots, chopped chilies, cashews, chopped ginger. Add a Table spoon of oil on the dosa and cook till the bottom of the dosa turns golden brown. Fold the dosa into half and serve the yummy rava dosa with coconut chutney and ginger chutney. rava dosa TIPS
  • Roasting the rava makes it retain its grainy texture even after soaking the batter for half an hour. This helps in attaining net texture to dosa.
  • Generally the rava dosas are crispy. If you want them to be soft add more of the maida an rice flour.
  • Add grated coconut instead of carrot for a different taste.
  • At the time of pouring the batter on the tava, mix the batter from the bottom as the flours and rava tend to settle at the bottom of the bowl.
  • Keep the leftover batter in the refrigerator and this keep away the rava from further fermenting.
  • Curd can be skipped if you do not like the taste.
  • Add oil liberally so that you can get crispy dosas.
  • If the stuffing is not used you can flip the dosa and cook on the second side also.
  • Alternatively all the stuffing ingredients can be mixed in the batter and use the batter to make dosas. In this method you can cook the dosa on both the sides.(Use this batter the same day.)
hema 008
Rava dosa

Friday, August 27, 2010

KALAKAND

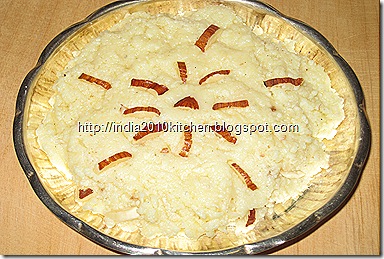
Kalakand is a authentic milk sweet loved by every one. This grainy textured sweet had its origin in Uttar Pradesh.  As a child I wondered how it is made. I thought that plain paneer(channa)  is used in making this. I used to experiment mixing channa , sugar and cooking the mixture along with ghee. But never I got that traditional taste. When I grew up I learnt that khoya and channa  are both combined to make the dish.
There are many varieties of kalakand available when you go to a sweet shop. Basically there are two varieties. One is the white colored one and the other is a light brown one.  All the other varieties are made by mixing some other ingredients to make it tastier. Coco powder, chocolate, pista, badam powder, Raisin paste etc are used to enhance the taste. The ratio of channa to khoya decides the texture and color of the kalakand. Here I used equal ratios of khoya and channa. You can change the ratio to suite your taste.
Home made paneer and khoya makes best tasting kalakand, but it takes a very long time. If you want to make it quickly use the store bought paneer and khoya. Here I made both channa and paneer at home. I will give details of both the versions.
METHOD 1
INGREDIENTS 
  • Whole Milk                   3litres
  • Sugar                           1/2 kg
  • Lemon juice                3 Tsp
  • Cardamom powder      1/2 tsp
  • Chopped Nuts             for garnishing
  • Ghee                            2 Tsp
PROCEDURE
MAKING PANEER
Take 1+1/2 liters of milk in a pan, switch on the flame the  and let the milk boil. Now add the lemon juice, keep stirring. The milk starts to curdle. If needed add more of the lemon juice. When the paneer completely separates from the whey, sieve it with muslin cloth in a sieve. Discard the whey. Keep the sieve with paneer under cold water or put some ice cubes with water in the paneer. This helps paneer to retain softness and also removes lemon smell from paneer.  Squeeze out the excess water and keep the paneer separately. 


  MAKING KHOYA(KOVA)
Take the remaining milk in a thick bottomed pan. Bring it to a boil. Keep on a medium flame and keep stirring the milk till the milk reduces to 1/4th. I t takes about 45 minutes. The creamy layer( malai) should not form on the milk, so keep on stirring. If you stop stirring for a minute the milk may stick onto the bottom of the pan, so be cautious. Now add the sugar. Now the sugar melts and the milk again increases. Now its the crucial time. Keep on a low flame and continue stirring. After half an hour or so the milk tends to form khoya(kova).( the time depends on the amount of milk ). The khoya making is very tedious so call your friend or husband to help you in continuous stirring. 
MAKING KALAKAND
Before the milk completely forms into khoya, but is very much thick add the paneer and stir. Now add the ghee and keep stirring. Now a thick lump of kalakand is formed, remove it onto a greased plate and let it set for an hour. Garnish with the desired nuts and cut into desired shape.                                         
METHOD 2
INGREDIENTS
  • Paneer                                1 cup
  • Evaporated milk                  1/2 cup
  • Sugar                                  1/2 cup
  • Ghee                                   2 Tsp
  • Cardamom                           a pinch
                            OR
  • Paneer                                1 cup
  • Plain khoya                          1 cup
  • Sugar                                   1 cup
  • Cardamom                            a pinch
PROCEDURE
The second method is very simple and it is also done in very less time. Making paneer at home is easy so go for it or grate the store bought paneer and keep it aside. If the paneer measures one cup take half cup of the evaporated milk. Mix in the paneer, sugar and evaporated milk( can replace evaporated milk and sugar with condensed milk) and keep the mixture on fire. Initially the mixture loosens, keep on stirring. When the mixture tends to thicken add a couple of tablespoons of ghee and cardamom. Stir well and remove onto a plate. Garnish with nuts and let cool. When completely cooled cut into desired shape.
If khoya is used mix in the khoya, paneer,  sugar and keep it on a stove. If the mixture is too thick add a little bit of milk. Add the ghee and cardamom. Let the mixture cook on a slow flame for about 5 minutes. Remove on to a plate, garnish and cut into pieces after it is cooled.
KALAKAND

Friday, August 13, 2010

PURANPOLI/BOBBATTLU


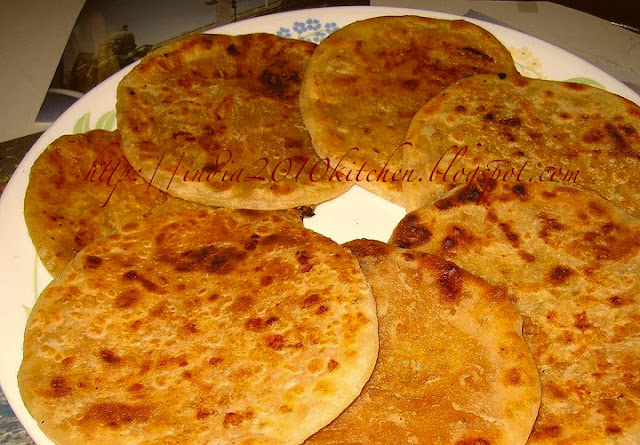
This is a popular classic sweet made in south and west of India on festive occasions, called with different names in different states. It is puran poli as called in Maharastra, Bobbattlu in Andhra pradesh, Obbattu or holige in Karnataka, Poli in Tamilnadu. The stuffing is usually prepared with Chana dal and jaggery. Can make variations in the stuffing by replacing chanadal with toordal or using grated coconut to enhance taste. This is usually served with Ghee and sweetened milk.
INGREDIENTS
  • Maida                      2 cups
  • Water                      to mix
  • Oil/ghee                  4 Tsp
  • salt                          a pinch
FOR THE PURAN (STUFFING)
  • Chana dal                   1 cup
  • Jaggery                      3/4 cup
  • Elachi powder            a pinch
  • Ghee                          for frying
PROCEDURE Take maida in a bowl and add the salt and ghee/oil. Mix well till the mixture attained crumbling texture. Now slowly add water and make a stiff dough. Now add more of ghee/oil and knead the dough till soft. Let the dough rest for at least 1hour.  Add enough water to the dal and pressure cook it till soft. Take the dal onto a paper towel and remove the excess water if any. Cool the dal and grind it . Grate the jaggery and measure 3/4 cup. Add this to the grind dal. Mix well till everything incorporates  well and forms into a thick paste and easily made into a round.  Add the elaichi powder also. Divide the dough and the stuffing into equal parts. The dough should be equal to size of a small lemon . The stuffing should be double the size. The puran poli can be made in two different ways. METHOD1 Take the dough on a plastic sheet and press it gently into a round circle. Grease your hand to press easily. Now place the stuffing in the round, bring the dough edges onto the stuffing and seal it with the dough.( The procedure is same as making the aloo paratha). Again press the dough into a 5 inches circle by applying ghee on your hand. Heat the tava and place the puran poli on it. Add a tea spoon of ghee on each side and fry the puran poli till golden brown on both sides. METHOD2  Roll the dough with a rolling pin and dusting it with flour. Make a small circle and place the stuffing inside it and seal it. Again roll it into a thin circle and fry it on a tava with ghee. Serve hot with ghee or milk.

 TIPS 
  • Make the puranpoli as soon as the stuffing is made otherwise the stuffing can become watery.
  • If you feel that the stuffing is watery and cannot be made into balls place it in a pan and heat it. Stir continuously till the mixture starts bubbling and then slowly becoming hard. Take this onto a plate, cool it and once it hardens use as the stuffing.
  • The above method can also be used if you want to have much sweeter puran poli.( Add more jaggery to increase sweet)
  • Be liberal in adding ghee/oil in making dough to get softer puranpoli. 

PALAK PANEER

PALAK PANEER
Palak Paneer
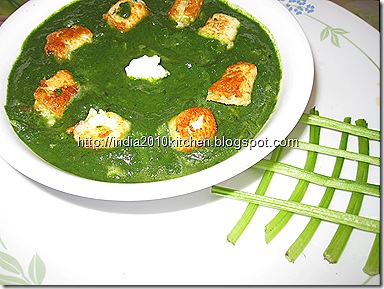
Palak paneer is a healthy, traditional delicacy from North India. This mouth watering side dish for any Indian bread is made with fried paneer in creamy spinach sauce. There are many ways of making this dish. Here I give my version of making delightful palak paneer with simple ingredients.
INGREDIENTS
  • Spinach/palak                       3 bunches
  • Paneer                                  200 gms
  • Cream                                   1/4 cup
  • Oil                                         4 Tsp
  • Ginger Garlic paste               1 Tsp
  • Cinnamon                             1/2 inch
  • Cloves                                   2-3
  • Salt                                       to taste
  • Sugar                                    1 Tsp
  • Onions                                  1 large
  • Tomato                                 1 Large
  • Green chilies                         2 small
PROCEDURE
Cube the paneer and set aside. Blanch the tomato and puree it. Chop the palak and add 3/4 cup of water, sugar, green chilies. Put the palak and water on fire and when the water boils cover with lid and simmer for 1minute or until palak becomes soft. Sugar makes the palak retain its color. Cool the palak, green chilies and grind to a paste. Reserve the water and use it if the curry is thick or use the water to mix the dough for chapathi.
In a pan add 1Tsp of oil and add the ginger garlic paste, cinnamon, cloves, chopped onions. Sauté  the ingredients and add salt just for the onions to become soft. When the onions become soft, cool it and grind to a paste.
Now heat another pan and add the remaining oil and just fry the paneer for a minute and remove onto a paper towel. In the same oil add the onion paste, cook for a minute. Now add the blanched and pureed tomato. Cook for another minute and add the palak puree. Add the salt. Cover and cook on a slow flame for five minutes. Now add the fried  paneer cubes and mix well. Cook for a couple of minutes and just before you switch off the stove add the cream. Serve hot with naan, roti, chapathi, fried rice,pulav or even steamed rice.
TIPS
  • Do not pressure cook or overcook  the palak as it changes its color.
  • Paneer can be used as it is - without frying, to cut down the calories.
  • Skip the cream and use thick creamy curd.
  • Whole process should be done on a medium flame so that the palak retains its color and tastes great. 
  • For a healthier version try tofu instead of paneer.

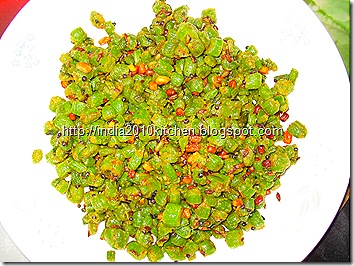
AMARANTH STEMS FRY

AMARANTH STEMS FRY
Amaranth is called THOTAKURA  in telugu. The leaves are used to make dal , fry, soup or stew and unlike  other leafy vegetables the stems of amaranth  are discarded if they are thick. These stems can be used to  make a delicious fry. Fresh and tender amaranth stems combined with besan and rice flour can make a best side dish for sambar rice or can be had directly with steamed rice.
INGREDIENTS
  • Tender amaranth stems                           2 cups( chopped)
  • Besan                                                       1 Tsp
  • Rice flour                                                 1 Tsp
  • Oil                                                            2 Tsp
  • Salt                                                          to taste
  • Chana dal                                                 1 tsp
  • Urad dal                                                   1 tsp
  • Mustard seeds                                         1/4 tsp
  • Hing                                                         a pinch
  • Green chilies                                           1 finely chopped
PROCEDURE
Finely chop the stems. If the stems are thick and contains layer over it, remove the layer and then chop. In a pan heat oil and add the chana, urad dals and mustard. When the mustard splutters add the hing, amaranth stems and green chilies. Add salt and cover with lid. Simmer the flame and let the stems become soft. After 3 minutes remove the lid and fry for a minute on high flame. Now add the besan and rice flour and fry for another minute and serve.
TIPS
  • Skip the besan, rice flour and add soaked chana dal (a hand full of chana dal soaked for 2 hours) for a different taste.

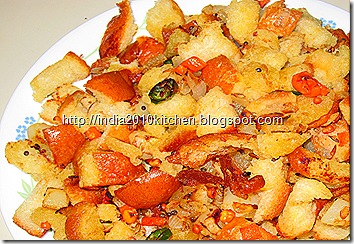
BREAD UPMA

BREAD UPMA
Bread Upma
Some times you will be left with bread which you don’t want to throw away or non of your family members are interested in eating. Try out this easy jathpata bread upma, simple and delicious. Serve it as a breakfast or evening snack.
INGREDIENTS
  • Left over bread              1/2 packet (cut to cubes)
  • Onions                          1 chopped
  • Potato                           1 cubed
  • Carrot                            1 cubed
  • Oil                                 3 Tsp
  • Salt                               to taste
  • Green chilly                   1(chopped) 
  • Chana dal                       1/2 tsp
  • Urad dal                         1/2 tsp
  • Mustard                         1/4 tsp
PROCEDURE
Heat oil in a pan and add the dals and mustard. When the mustard splutter add the carrot, potato, onion pieces. Add enough salt just for the veggies and fry them. When the veggies become soft add the chopped green chilies and fry. Now add the bread cubes and fry them. Be sure to lower the flame while frying bread otherwise it burns out quickly. Fry until the edges of bread turn brown and turn crispy. Serve hot with any sauce or chutney and a glass of orange juice makes a perfect combination for this dish. The crunchy dal along with soft veggies and crispy bread taste awesome.
TIPS
  • Add other veggies to suite your taste.
  • Do not add too much of salt to the veggies.
  • Ginger and garlic can also be added for a different twist.
  • Add a tomato or tomato puree to the veggies to get soft bread upma.

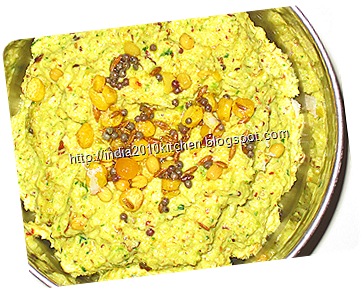
COCONUT CHUTNEY FOR RICE

COCONUT CHUTNEY FOR RICE
Coconut Chutney
Anything made with coconut is delicious. Let it be dessert or savory, it tastes best with coconut. When its the festive season coconut chutney is a must in my house. The sweet and spicy coconut chutney made with fresh coconut is a best accomplishment for hot steamy rice with lots of ghee. 
INGREDIENTS
  • Fresh grated coconut                       1 cup
  • Green chilies                                     3
  • Coriander                                          4 sprigs
  • Oil                                                     1 Tsp
  • Tamarind                                           small piece
  • Turmeric                                           a pinch
  • Sugar                                                1/2 tsp(optional)
  • Salt                                                   to taste
  • Chana dal                                          1 tsp
  • Urad dal                                             1 tsp
  • Mustard                                             1/2 tsp
  • Hing                                                   a pinch
PROCEDURE
In a pan add oil and heat it. Add the mustard, urad dal, chana dal, hing. Add the slit green chilies. When the tadka is done take it in a bowl. In a blender add the green chilies, sugar, salt, tamarind, turmeric, coriander,half of the tadka and blend to a fine paste. Now add the coconut and blend till it forms a paste. If needed add a little water. Take it in a bowl and add the remaining tadka. Serve with hot rice.  

CHANA MASALA


Chana masala, also called chole is a very popular side dish for batura or puri or naan. This simple yet delicious sour and spicy dish from Punjab is made with garbanzo beans in a onion tomato gravy.
INGREDIENTS
  • Chana                         1 cup
  • Onions                        1 large( finely chopped)
  • Tomatoes                    2( finely chopped)
  • Cilantro                       4 sprigs
  • Ginger garlic paste      1 Tsp
  • Whole garam masala  ( Cardamom, cloves, bay leaves, cinnamon)
  • Tea powder                 1 Tsp
  • salt                              to taste
  • Sugar                           1 tsp
  • Oil                               3 Tsp
  • Turmeric                      a pinch
  • Red chilly powder        1 Tsp
  • Jeera                           1 tsp
  • Chole masala                1 Tsp
  • Lemon juice                1 Tsp
PROCEDURE
Soak the chana overnight with some turmeric added to water. In a muslin cloth tie the Whole garam masala, tea powder. Cook the chana in a pressure cooker along with the muslin cloth in which the whole garam masala is tied. When the chana is cooked discard the masala in the muslin cloth and separate the water from chana. Roughly  Mash half of the chana  and leave the other half as it is. In a pan heat the oil and add the jeera. Add the  ginger garlic paste and Onions. Fry for a minute and now add the tomatoes. Cover and cook for another minute till the tomatoes and onions are soft. Add the chana, salt, sugar and chilly powder. Cook for another minute and  add the water from the boiled chana. Cover and cook on a very slow flame for at least 20 minutes. Adjust the consistency of the gravy to your taste. Finally add the chole masala, lemon juice and cilantro and stir. Serve hot with batura or puri or naan or chapathi. It tastes good with fried rice or biryani also.  

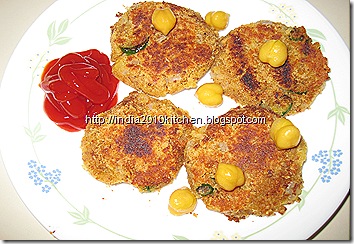
CHANA TIKKI

CHANA TIKKI
Chana Tikki
Chana or Garbanzo beans as called are used in preparing many dishes. These can be used in many curry dishes. Tikkis made with chana is a simple snack. This simple and easy healthy delicious snack can be made in very less time.
INGREDIENTS
  • Chana                             1 cup
  • Potato                           2
  • Bread crumbs                 1/4 cup
  • Green chilies                  1(chopped)
  • Grated ginger                 1 tsp
  • Onion                             1
  • Coriander                       2 sprigs
  • Salt                                to taste
  • Oil                                  for shallow frying
PROCEDURE
Soak the chana overnight. Boil and peel the potatoes. Mash the potatoes and grind the chole to a fine paste. Cut the onions, green chilies and coriander into fine pieces. Mix in the potatoes, chana paste, onion pieces, coriander, ginger, green chilies, salt and bread crumbs. Make the mixture into small tikkis. Shallow fry the tikkis on a tava on a slow flame. Serve the tikkis with tomato sauce or sweet and sour chutney.
TIPS
  • If the mixture is too mushy and cannot be made into tikkis add little rice flour or maida.
  • Beat thick curds into a creamy texture, add cream cheese, little pepper and serve tikkis with this mixture.
  • Alternatively use chana dal in place of chana to make the tikkis. Soak chana dal for 3 hours and use.

VANKAYA PAKODI


Vankaya pakodi is a simple delicious Andhra dish. It can be made easily in bulk quantities. It is a often made dish in hostels in Andhra. As this dish contains pakodi which is a favorite snack of everyone this vankaya pakodi is also liked by all. So, many student hostels and messes find it easy to satisfy the students with this curry. Now and then I also find the curry being made in marriages and functions.
INGREDIENTS
  • Brinjals                   1/2 kg
  • Green chilies           2
  • Salt                         to taste
  • Turmeric                 a pinch
  • Onions                    1(chopped)
  • red chilly powder    1/2 tsp
  • Curry leaves            a few
  • Coriander               2 sprigs
  • jeera                      1 tsp
  • oil                           3 Tsp
for the pakodi
  • Besan                      1 cup
  • Rice flour                2 Tsp
  • Onions                    1(cut into thin slices)
  • Green chilies           2(finely chopped)
  • salt                          to taste
  • Ginger garlic paste   1 Tsp
  • Oil                            for deep frying
PROCEDURE
Making the pakodi
Mix in the besan, rice flour, onions, salt, green chilies, ginger garlic paste and a Tsp of oil. Mix well and add a little of water to make a thick paste. In a pan add the oil for deep frying. Put the batter in the oil in small portions and fry them till golden brown in color. Remove them onto a paper towel to remove excess oil.
Making the curry
Cut the brinjals and put them in a bowl with some water and salt. In a pan heat 3 tablespoons of oil and add the jeera and the curry leaves. Add the onions and sauté them for a minute. Add the brinjals, turmeric, salt.  Cover the pan with a lid and cook on a medium flame by stirring intermittently. When the brinjals are completely cooked add in the pakodi and again cook for 3 minutes by covering with a lid. Sprinkle some water so that the curry is not very dry. Finally add the chopped coriander and chilly powder and take into a serving dish. Serve hot with rice.
TIPS
  • Traditionally brijal pieces are also deep fried in oil. But here I cooked the brinjal to decrease the calories. This version is also tastes yummy.
  • Make the soft pakodi and not the hard pakodi.
  • I used paprika and red chilly powder to give a color, but you can skip these. 


MENTHI MAJJIGA


Menthi majjiga as called is telugu is the tempered buttermilk. There is a no cooking involved in making this menthi majjiga. When you are left with lots of buttermilk, try this simple flavorful dish. It goes well with plain rice or dal and rice combined( pappu annam). Menthi majjiga increases the digestion.
INGREDIENTS
  • Buttermilk                    2 cups
  • Green chilies                1(chopped)
  • Salt                               to taste
  • Coriander                      2 sprigs
  • oil/ghee                        1tsp
  • Mustard                         1/4 tsp
  • Methi seeds                   1/4 tsp
  • Jeera                              1/2 tsp
  • Red chilies                       1
PROCEDURE
Take the buttermilk in a bowl and add the salt. green chilies, coriander leaves. In a small pan add the oil and heat it. Add the mustard, methi and jeera. Add the red chilly pieces, hing . When the tadka is done add it to the buttermilk. Serve it with rice.

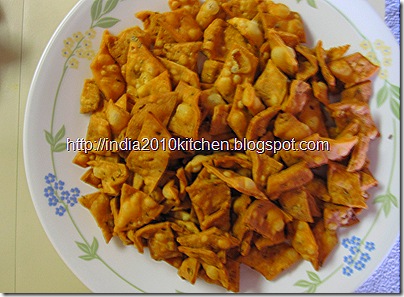
MAIDA DIAMONDS

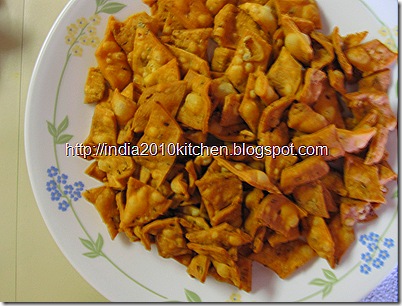
maida diamonds (3)
Maida Daimonds

These small savory munchies are  a  good evening  snacks for your children after they come from school and they are the best teatime snacks for you. This simple savory spicy snack is called by different names. Maida biscuits, Diamond cuts, maida chips etc. These can be stored for up to 2-3 weeks. But I am sure your family will complete these in 2-3 days.
INGREDIENTS
  • Maida                    2 cups
  • Salt                        to taste
  • Red chilly powder  1 Tsp
  • Ajwain(vaamu)      1 Tsp
  • Water                     to make the dough
  • Oil                           for deep frying
PROCEDURE
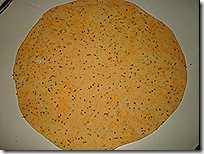
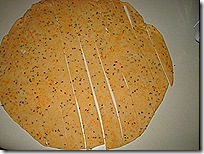
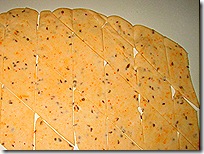
Mix in the maida, salt, chilly powder and ajwain. Add 2 table spoons of oil and mix it well in the maida. Now slowly add the water and make the maida into a soft stiff dough. Rest the maida for at least 2 hours. Knead the dough with a little of oil and divide it into 5 equal parts. Dust a plain surface with maida and roll each portion of the dough into a thin circle. With a knife cut the chapathi vertically to form 1 inch wide strips. Now cut these strips horizontally to form diamond shaped pieces. Make all the pieces and spread them on a paper. Cover the pieces with another paper so that the pieces don't dry out. Now heat oil in a pan and when the oil is heated add a small batch of the pieces in oil and fry them on a medium flame. Cook the diamonds till golden brown. Remove them onto a paper napkin to remove excess oil. Store in a airtight container.

hema 001
hema 002 hema 003
TIPS 
  • Cook on a medium flame to get the right color and crispiness.
  • Can replace ajwain with jeera.
  • Add a table spoon of sesame seeds to enhance the taste.
  • Adding oil to the maida before making the dough tends to form crispy maida diamonds.
  • Do not reduce the flame below medium because the chips absorb more oil at low temperature.
maida diamonds
Maida Daimonds

GUTTI VANKAYA/STUFFED BRINJAL

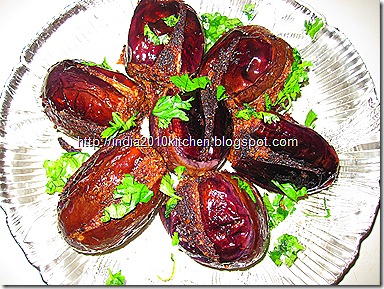
STUFFED BRINJAL CURRY
Gutti vankaya/ Stuffed Brinjal
Gutti vankaya or stuffed brinjal is a traditional Andhra dish. Tender baby brinjals are stuffed with masala and cooked on a slow flame till the brinjal absorbs the flavor of the masala . Alternatively the curry can also be made in a pressure cooker if the brinjals are hard or if you are in a hurry. Oil is liberally used to make the curry taste ultimate. This is a must curry in my home if guests come. Brinjal is my favorite vegetable and  I make at least 20 variety of dishes with this. I’ll try to post most of them. Different variety of stuffing's can be used to make the curry. Here I am giving a simple version of stuffed brinjal which is made in marriages and functions in Andhra.    
INGREDIENTS
  • Tender round brinjal                      8-10
  • Oil                                                   1/4 cup
  • Salt                                                 to taste
  • Coriander seeds                              2 Tsp
  • Chana dal                                        4 Tsp
  • Urad dal                                           2 Tsp
  • Red chillies                                      8
  • Jeera                                               1 Tsp
  • Coriander                                        2 sprigs
PROCEDURE
Take the brinjals wash them thoroughly  and cut the stems. Take each brinjal, starting from one end make a plus shaped slit towards the other end, but not all way through. Be careful and do not  make 4 pieces. Keep these brinjals in salt water.  
In a pan add a table spoon of oil and add the chana dal, urad dal, coriander seeds, red chilies, jeera. Fry on a slow flame till golden brown. Cool the masala and add to the blender. Now take the coriander leaves and add to the blender. Grind the masala to a fine paste along with salt.
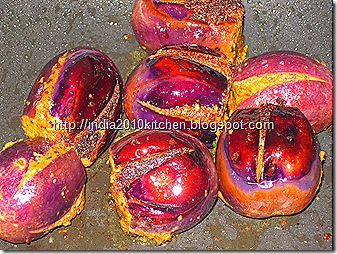
GUTTI VANKAYA
Now take each brinjal and put a table spoon of the stuffing inside the slit and slowly push the stuffing gently inside so that the brinjals don’t break  and then press the brinjal tight.  Tie a thread around brinjals so that the stuffing doesn't fall apart(optional). Fill the stuffing in all the brinjals.
Now heat a pan and pour 3 table spoons of oil. When the oil is heated slowly put the brinjals in the pan. Sprinkle a little salt on the brinjals and cover with a lid. Simmer the flame and cook the brinjals stirring them intermittently. Turn each side of the brinjals onto the pan and cook until every side is cooked and becomes tender. If required add some more oil and fry the brinjals. The process should be done on a slow flame and so have patience. Close with the lid throughout the process and remove lid only to stir the brinjals. It take almost 20-25 minutes to cook the brinjals from the inside. Enjoy with steamed rice.
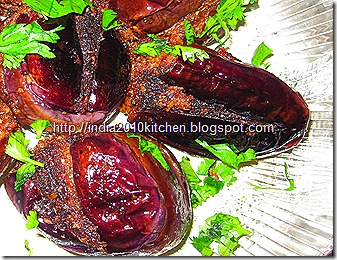
STUFFED BRINJAL
Stuffed brinjal

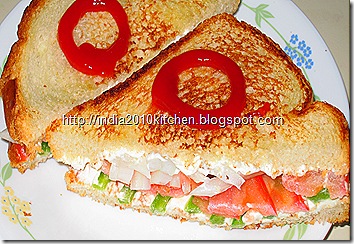
BREAD SNADWICH

BREAD SANDWICH
Bread Sandwich
Here I come with a simple bread sandwich, made in minutes. Simple yet delicious and healthy.
INGREDIENTS
  • Bread                                 6 pieces
  • Tomatoes                           1
  • Onions                                1
  • Capsicum                            1
  • Salt and Pepper                  to taste
  • Cream cheese                     3Tsp
  • Mayonnaise                         3 tsp
  • oil/ghee                              For toasting bread
PROCEDURE 
Toast the bread on a tava with ghee/oil.
Cut the onion, tomato, capsicum into long thin pieces.
Cool the bread a little bit and smear cream cheese and mayonnaise on one side of each bread.
Place the veggies on one bread, sprinkle with salt and pepper and close with another bread slice with the cheese side on the veggies.
Serve with tomato sauce. 
TIPS
  • Can have it without toasting also.
  • Can add veggies of your choice.(jalapenos, carrots, boiled potatoes, cucumber, lettuce, cabbage)
  • Add red chili flakes for an extra kick.
  • Alternatively take the white bread trim the edges and make the sandwich with extra cheese and cool in a refrigerator and serve.( do not toast in this case)

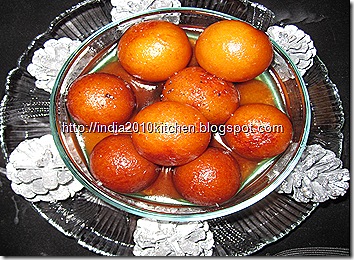
GULAB JAMUN(50th POST)


GULAB JAMUN
Gulab Jamoon
This is a jhatpata Indian dessert made with in minutes. This is all-time and everyone favorite dessert. This is the dish where children involvement is seen. It is a fun for them making small balls and giving different shapes to the jamuns. The main trick lies in frying the jamuns. The temperature should be just  right so that the jamuns are perfectly cooked otherwise you will end up with colored but uncooked jamuns. Some make them with store bought mix and some make these with milkpowder and maida. Pure khoya can also be used in making these. Here I used half of the store mix and half khoya.

INGREDIENTS
  • Julab jamun mix               1 cup
  • Khoya                                 1/2 cup
  • Water                                 3 Tsp
  • Oil/ghee                             for deep frying
For the syrup
  • Sugar                                  3 cups
  • Water                                 2+1/2 cups
  • Cardamom                          a pinch
  • Rose water                         1 Tsp(optional)
PROCEDURE Making the syrup and frying the jamuns can be done as parallel processes. Sugar syrup In a large pan  add the sugar and water. Put this on fire and once the sugar syrup reaches the boiling point reduce the flame and leave for 10 minutes. By this time the sugar syrup thickens. Now transfer the syrup into a large bowl enough for the jamuns to fit after they absorb the syrup and double in size. Combine the julab jamun mix, khoya and make the mixture into crumbling texture. Now slowly add the water and make a soft dough. Do not over knead the dough. Let the dough rest for 20 minutes. Now make small balls out on the dough. Smear ghee onto the palms and make soft balls without any cracks. Heat oil/ghee in a pan and when it is completely heated lower the heat and test the temperature by dropping a jamun in the oil. The ball should touch the bottom and then slowly raise to the surface. If the jamun immediately raises to the surface then wait for the oil to cool a little bit. Drop jamuns 5-6 at a time and  fry on a very slow flame. It takes about 2-3 minutes for the jamuns to get completely cooked from inside. If the flame is high the jamuns get colored from the out and remains raw inside. So the temperature is very important to get perfect gulab jamuns. As khoya is used there is a chance of jamuns becoming black very soon, so be cautious. When the jamoons become dark brown drop them  into the sugar syrup and let rest for atleast an hour. Serve hot or cold. Gulab jamuns combined with icecream tastes ultimate.
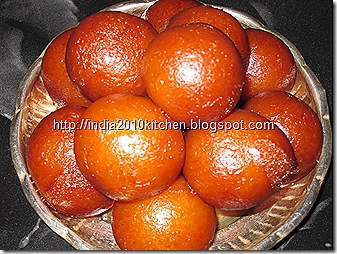
GULAB JAMOON
Gulab Jamoon
TIPS
  • The more the jamuns are soaked in syrup the more tastier they are. Soak for atleast 3 hours when making a big lot.
  • Remove the jamoons from the syrup and store the syrup and gulabjamuns separately so that they don't break by absorbing more syrup.
  • Fry until you get a dark brown color. Once they are soaked they become lighter.

Friday, August 6, 2010

MORKULAMBU/MAJJIGAPULUSU


Morkulambu as called in Tamilnadu or the majjigapulusu as called  in Andhra Pradesh is a South Indian version of kadhi. The leftover sour buttermilk is delicately cooked with vegetables and masala to get the great taste to the dish. Here I give a typical Andhra style of this recipe.
INGREDIENTS
  • Butter milk               3 cups
  • Turmeric                   a pinch
  • Salt                           to taste
  • Vegetables               1 cup[okra, bottle guard, pumpkin, chow chow]
  • Cilantro                     3 sprigs
        For the masala paste
  • Coriander seeds          1 +1/2 Tsp
  • Chana dal                     1 Tsp
  • Rice                             1/2 Tsp
  • ginger                          1/2 inch piece
  • green chilies                2 small
  • coconut                       2 Tsp grated
       For the tadka 
  • Oil                                1 Tsp
  • Jeera                            1/2 tsp
  • Mustard                        1/2 tsp
  • Fenugreek seeds           1/4 tsp
  • Hing                               a pinch
  • Curry leaves                   4-5
 PROCEDURE 
Soak the ingredients for the masala paste for an hour. Grind them to a smooth paste. Cube the vegetables and boil them  in water along with salt till they are 3/4th cooked. Remove them and set aside. Now take the buttermilk in a thick bottomed pot and add the salt, turmeric, masala paste, cooked vegetables. Mix well and now set this on fire. The consistency of the buttermilk should be medium ( neither too thin nor too thick) as the dish thickens once cooked. Cook the mixture on a high flame. Once the mixture comes to a boil lower the flame, cook for another 2-3 minutes and switch off the flame. Now finally for the tadka heat oil in a pan, add the tadka ingredients and when they splutter add this to the majjigapulusu. Finally add the chopped coriander and serve this with rice and plain dal.
 TIPS   
  • Some times the buttermilk may tend to split once it is set on fire. If you feel that the buttermilk is going to curdle add a Tsp of besan  to the buttermilk.
  • Slow cooking can also curdle the buttermilk, so cook on a high flame and then reduce the flame.
  • Stir continuously till you get the first boil.
  • Avoid using tomatoes as they change the color of the dish.
  • I haven't  tried the onions, but you can give a try if you like.
  • Don't try to cook the veggies in the buttermilk. Pre cook the veggies and then add them to buttermilk. 
  • Gummadikaya vadiyalu goes well with this dish.

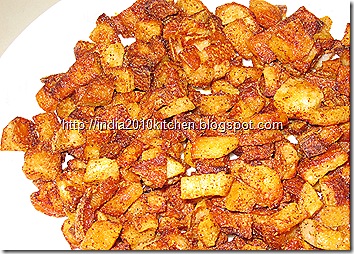
ARBI FRY

ARBI FRY
Arbi Fry
Arbi or Colacasia  is called as chamadumpa in Telugu. This was hardly used by few people in olden days, but now we see even the big restaurants serving this as appetizer or snack or side dish. Fried arbi with a light crunch can be a side dish for rice. Jeera powder, coriander powder , garam masala can be  used to enhance the taste.
INGREDIENTS
  • Arbi                    1/2 kg
  • Salt                     to taste
  • Paprika                1 tsp
  • Oil                        5 Tsp
  • Chili powder        1/2 tsp
  • garam masala       1/4 tsp
PROCEDURE
Wash and arbi and cook them with the skin on, preferably in a pressure cooker until 2 whistles. They take a very long time to cook on a open pan with water. They should be fully cooked but should remain firm. Overcooking make them mushy. Cool them and peel the skin. Now cut them to small pieces or desired shape. In a pan add the oil. Once the oil is heated add the arbi. Fry them on a medium flame stirring occasionally. When they are 3/4 done add the salt. Now increase the flame and keep stirring to attain a golden brown color and the outer layer turned crispy. Finally add the paprika, chilly powder, garam masala. Stir and  serve with hot steaming rice and sambar.

COCONUT RICE


Coconut rice is yet another delicacy made with coconut milk. It is mostly made in South Indian homes. Seasoned with ghee and cashews , this sweet, spicy and flavorful coconut rice is perfect for weekend lunch. It can be prepared in two different ways. One method is making with the coconut milk and the other is making with grated coconut. Aloo kurma or raita will be a perfect combination for this dish.
INGREDIENTS
  • Rice                        1 cup
  • Coconut grated      1 cup
  • Ghee                      2 Tsp
  • Cashews                3 Tsp
  • Jeera                     1 tsp
  • Chana dal              1 Tsp
  • Cardamom             4-5
  • Cinnamon             1/2 inch
  • Cloves                   5-6
  • Green chilies       1
  • Salt                      to taste
  • Hing                     a pinch
  • Cilantro               1 Tsp finely chopped
PROCEDURE
Method 1
Wash the rice and keep aside. Now take the grated coconut  in a blender and add water. Blend the coconut pieces till liquid. Now take the  liquid and strain it in a strainer. Extract the milk fully from the coconut by again adding water and blending. Measure  2 cups of milk and add to the rice. Add salt, cinnamon, cardamom, cloves and chopped green chilies. Mix well and cook the rice till done. Now take the ghee in a pan, heat and add the cashews,chana dal, jeera, hing. When the cashews turn golden brown add this mixture to cooked rice. Now add the chopped cilantro and mix well. Serve with raita or karma.

METHOD 2
This method is very simple. Cook the rice rice with 2 cups of water.  In a pan add the ghee and heat it. Add the chana dal , cashews, jeera,cinnamon, cloves, cardamom, green chilies and grated coconut. When they are done add to the cooked rice along with salt. Mix cilantro to the rice and it’s done.

TIPS
  •   Add hot or warm water to the coconut so that the coconut milk is fully extracted.

GOBI MANCHURIA

GOBI MANCHURIA
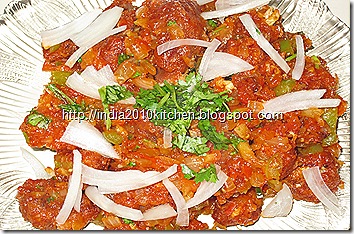
Gobi Manchuria
Manchuria is a Chinese recipe made with different vegetables and also seafood and chicken. This became a popular street foods as many other Chinese recipes. This is made with various vegetables and hence the different names for manchuria. Gobi manchuria, veg manchuria, baby corn manchuria etc. This Chinese recipe is adopted in India and underwent many changes to suite Indian tastes keeping the main ingredients as it is. The sauce made with soy sauce, tomato sauce, vinegar, chilly sauce tastes awesome.
INGREDIENTS
  • Cauliflower              1 medium
  • GingerGarlic paste   1 tsp
  • Ajinamoto               a pinch
  • Maida                      1/2 cup
  • Corn flour                2 Tsp
  • Oil                           for deep frying
  • paprika                  1 Tsp or (red food color- a pinch)
  • Salt                        to taste
  • Pepper powder     1/2 tsp
FOR THE SAUCE
  • Ginger           1/2 inch
  • Garlic             1Tsp(finely chopped)
  • Green chillies 1
  • Soy sauce      1 Tsp
  • Tomatosauce 1 Tsp
  • Chilly sauce     1/2 Tsp
  • Onion             1 small
  • Tomato          1 Small
  • Capsicum       1 small
  • Salt                a pinch
  • Oil                  2Tsp
  • Cilantro         (finely chopped) 1 Tsp
PROCEDURE
Wash the cauliflower and separate the florets depending on the size you prefer. In a bowl mix the maida, corn flour, ajinamoto, salt, gingergarlic paste, white pepper powder, paprika/red food color and water. Make a medium thick batter. Dip the florets in the batter and set aside for 10 minutes. Heat the oil in a pan and now deep fry the cauliflower florets.
In a separate pan heat two table spoon of oil. Add the finely chopped onions, tomatoes, capsicum one after the other. Now add the finely chopped green chillies, chopped garlic and juliened ginger and fry well. Add very little salt (for the vegetables only). Add the soy sauce, tomato sauce, chilly sauce. Mix well and finally add the fried cauliflower. Garnish with cilantro and onion slices and serve hot.
TIPS
  • The version I gave above is the dry version. For the gravy version add a Half cup of water to the cooked veggies and increase the amount of sauce. Finally add one tsp of corn flour to the prepared sauce to thicken it and then add the cauliflower.
  • Gobi manchuria goes well with fried rice or chapathi or roti.
  • Ajinamoto can be skipped, even then the taste will be nice.
  • The size of veggies purely depends on your taste.
Related Posts Plugin for WordPress, Blogger...